Step 1: Print and cut out your pattern. Pin your pattern onto the wrong side of your chosen fabric and trace around with a fabric chalk/marker. Make sure your fabric is doubled over. Download pattern HERE
Step 2: Once you have traced your pattern onto the fabric, cut your piece out, remember to leave a 6 mm trim around the edge, Trim neatly and snip around the curves as show on the template.
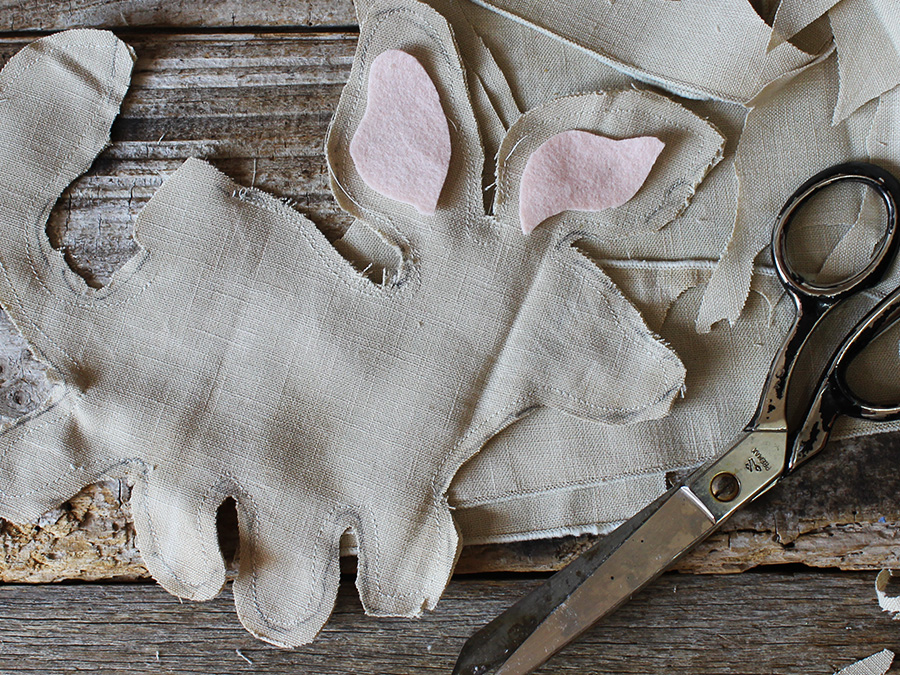
Step 3: You are now ready to turn your work right side out and start stuffing.
TIP: Before stuffing lightly dampen the fabric. This helps to reduce wrinkles.

Tear off small amounts of wool roving or fiber fill to stuff into the legs and tail.
Use a chopstick or broken knitting needle to stuff.
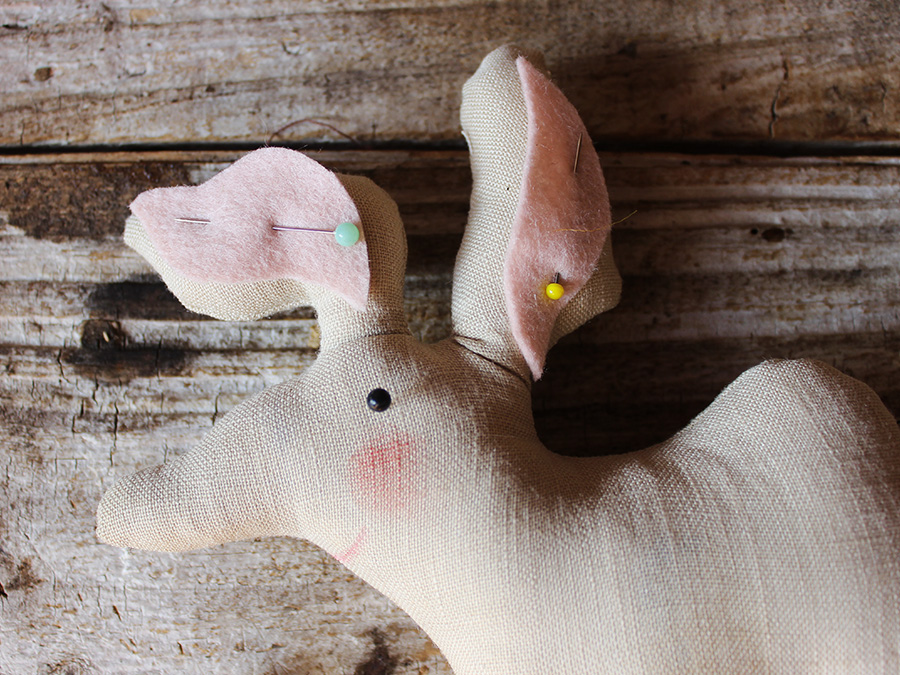
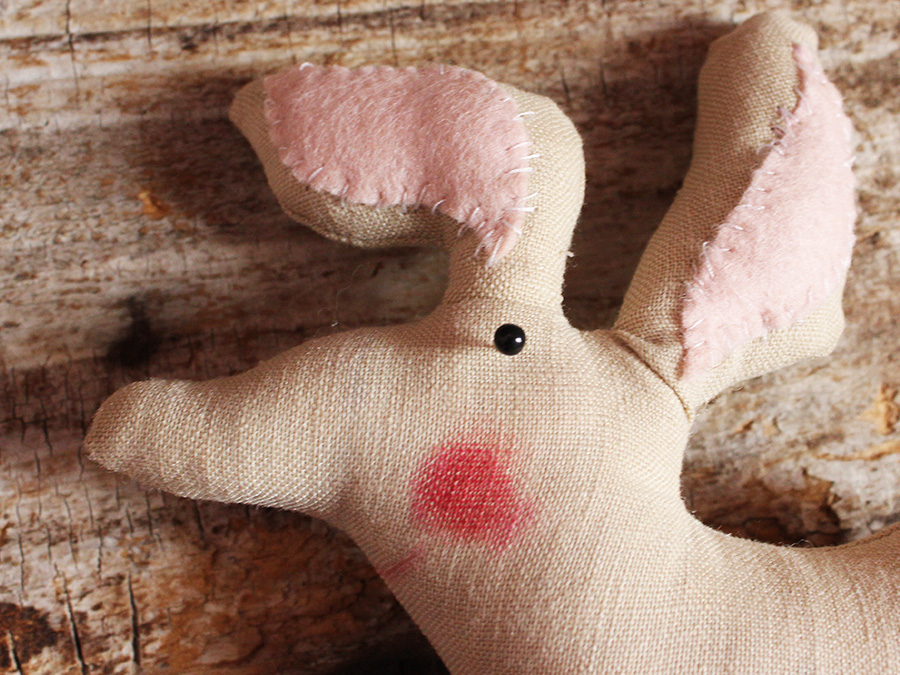
Step 4. Position eyes and inner ears with the help of pearl pins.
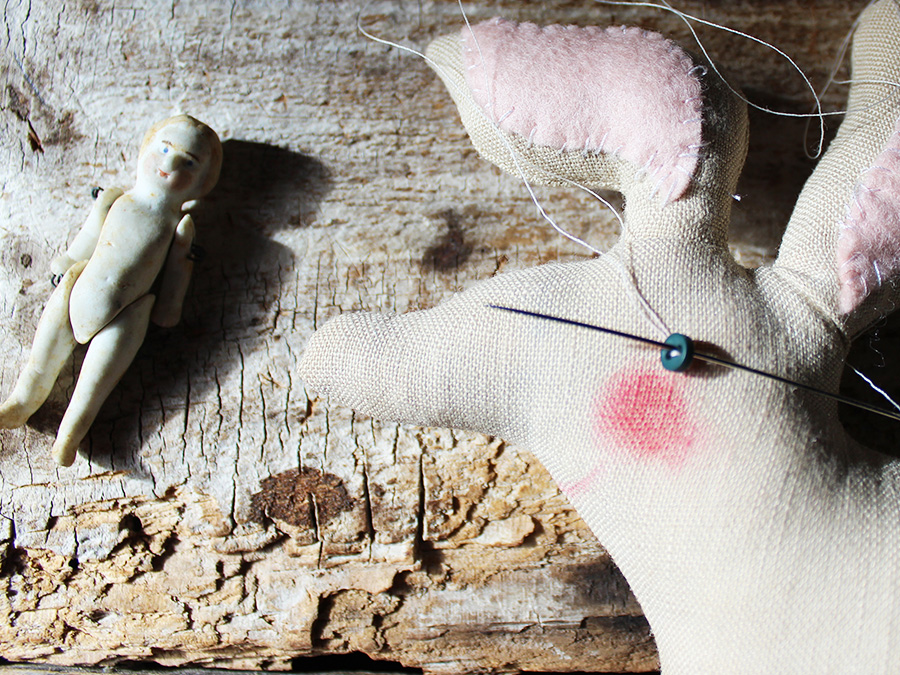
Step 5. Stitch tiny button eyes and the felt inner ear pieces.

Step 6. Embroider nose and add cheek colour with finger tips.

Step 7. Embroider the toes and whiskers.
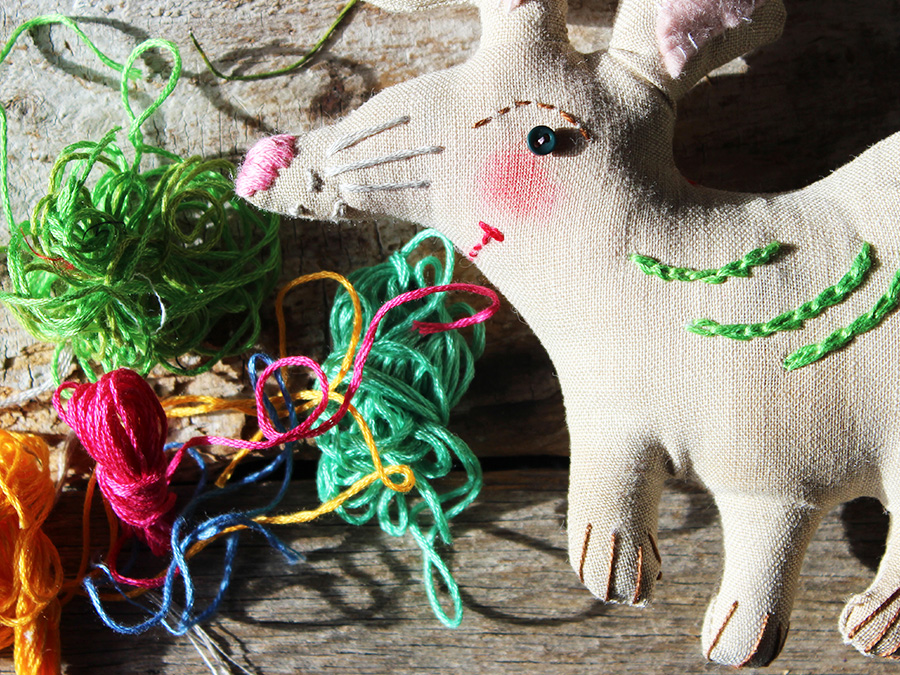
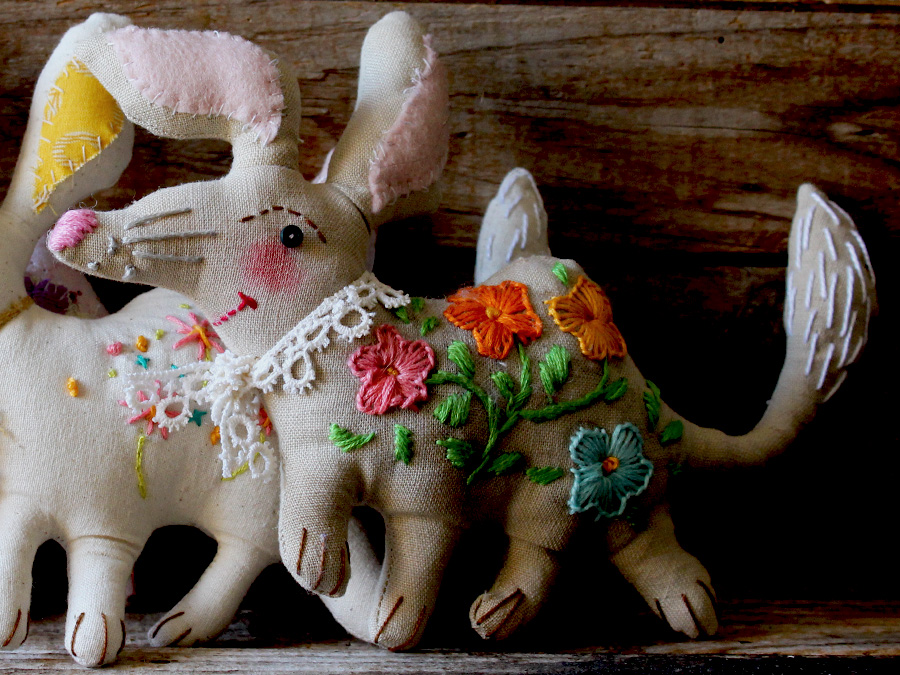
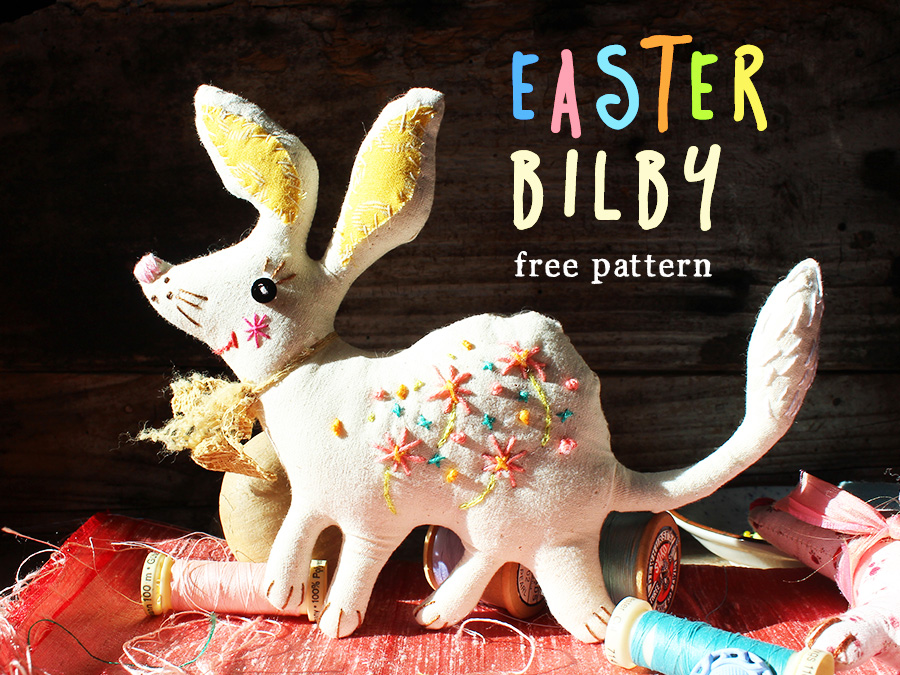
Step 8. Embroider using your favorite stitches onto the belly of your bilby,
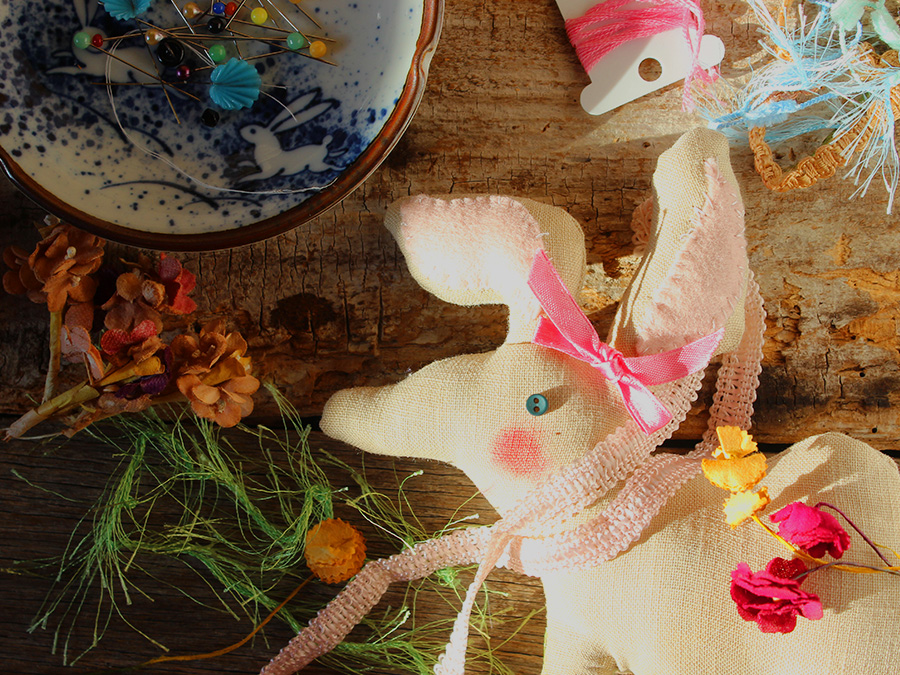
Step 9. Have fun adding ribbons and bows to your bilby.
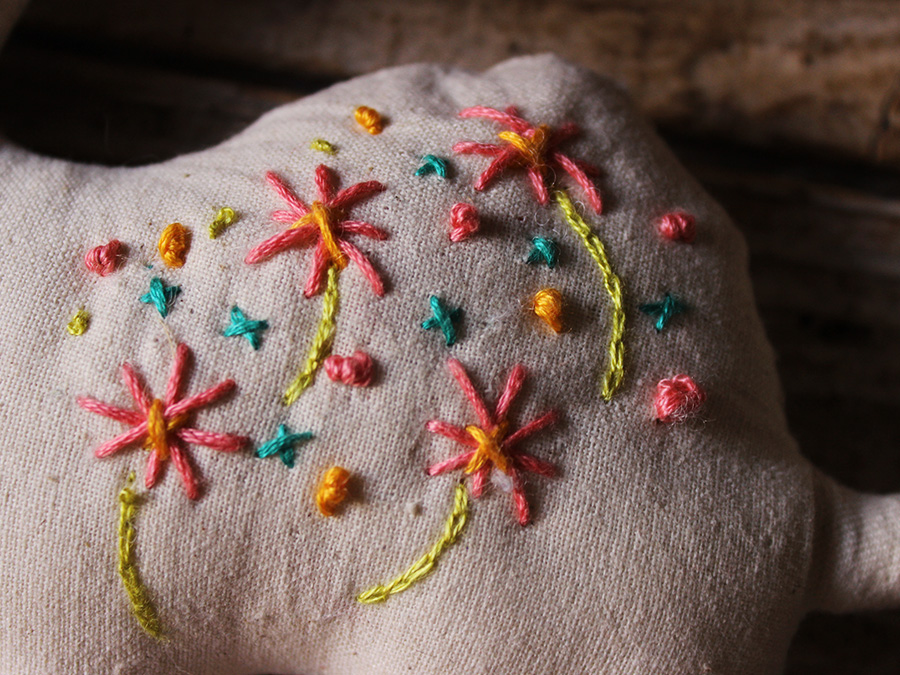
Detail of embroidery stitches in fun pastel colours.
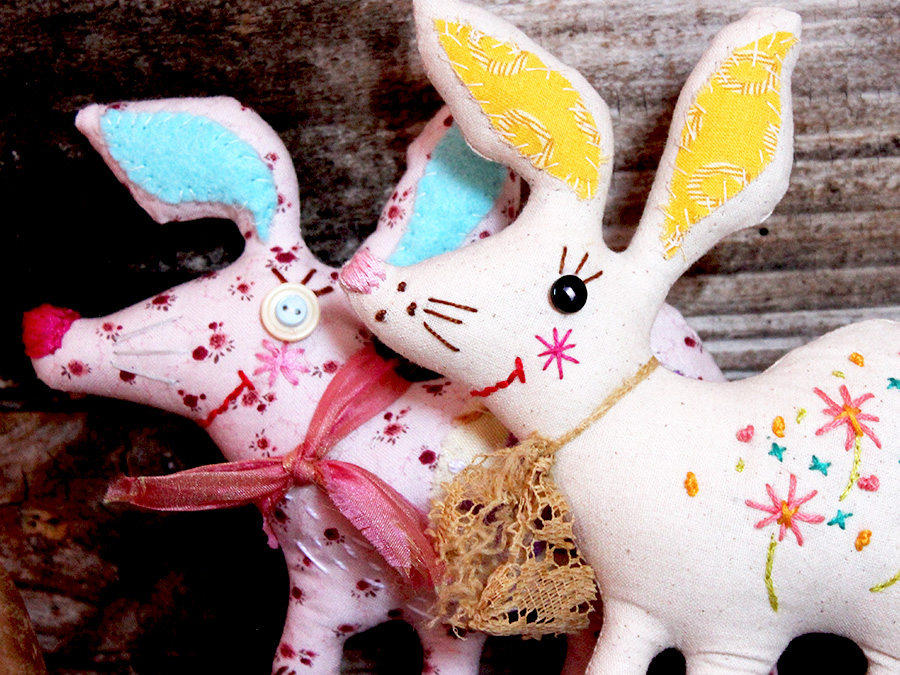
The choices are endless, you are only limited by your imagination, bilbys can be made from patterned fabric of any colour!