
Measurements:
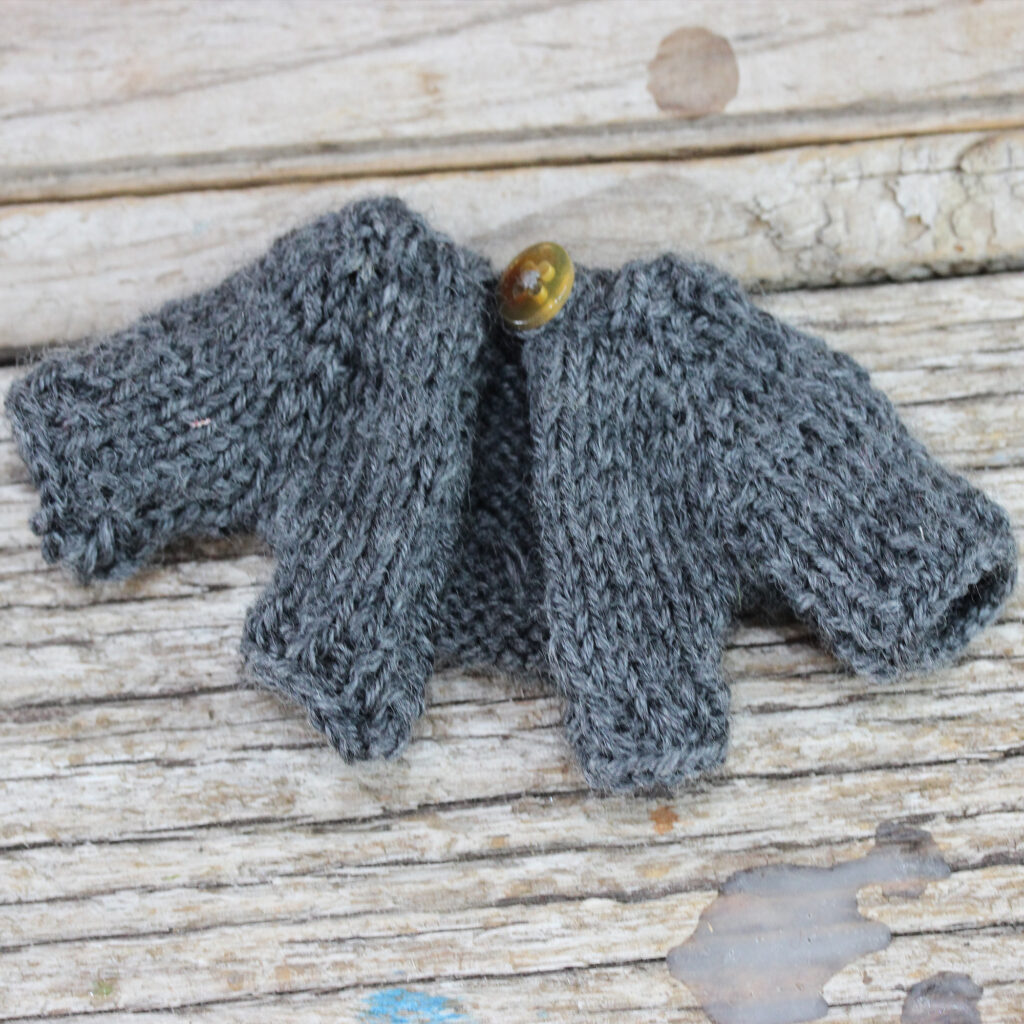
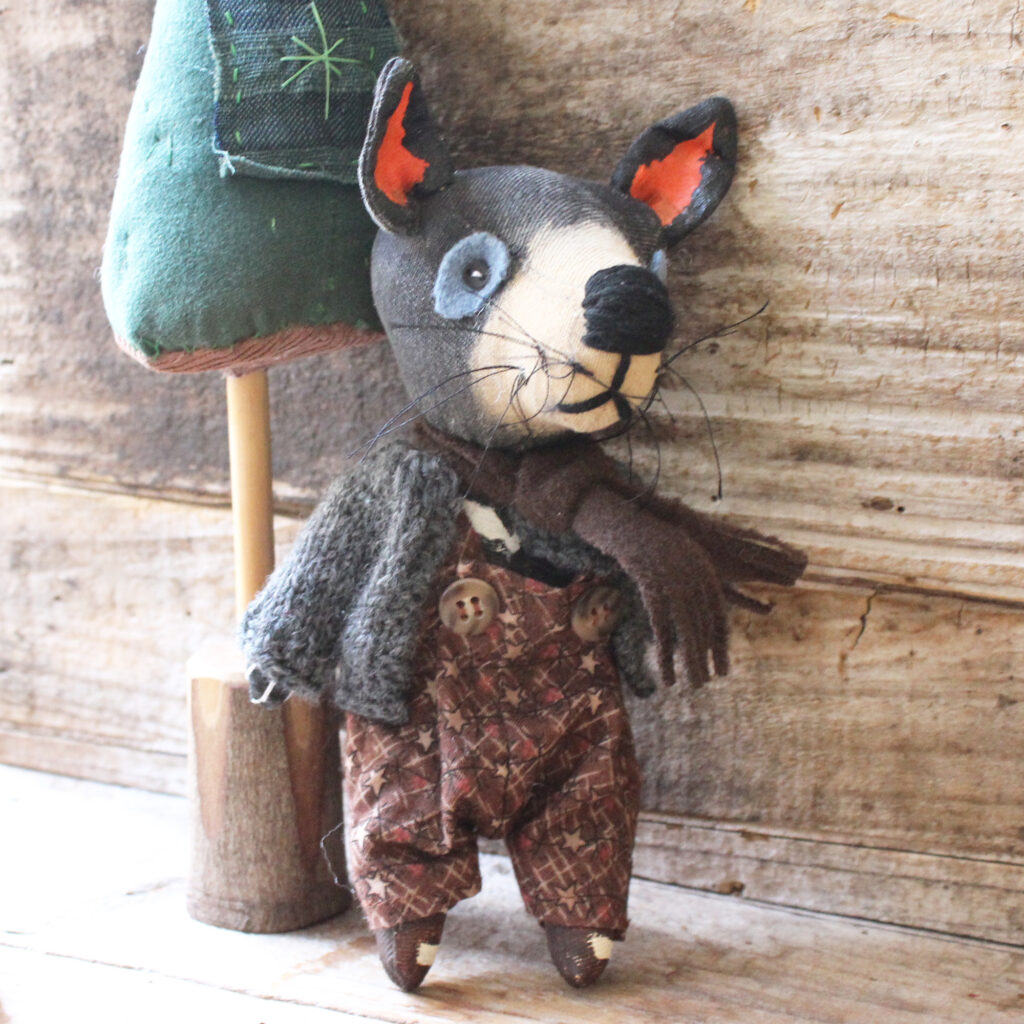
This cardigan is tailored to fit my Tasmanian devils, rabbits, donkeys
and, tiny rag dolls and elephants.
This pattern can also be made to fit any small 16 cm. 6.5 inch high doll.
The length of the sleeves may be adjusted to fit larger dolls like my cats.
Please see my notes on the last page.
Materials:
3ply, 4ply or sock yarn
2 x 2.25 mm (1U.S) knitting
needles or double pointed
needles
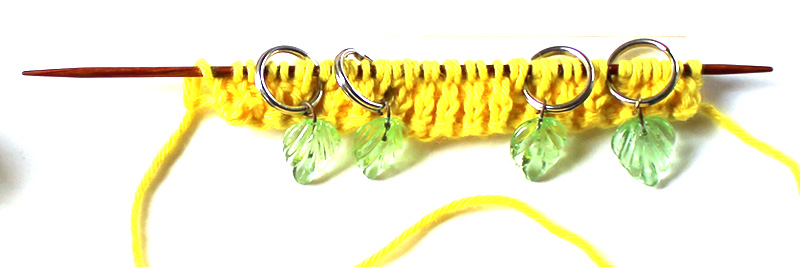
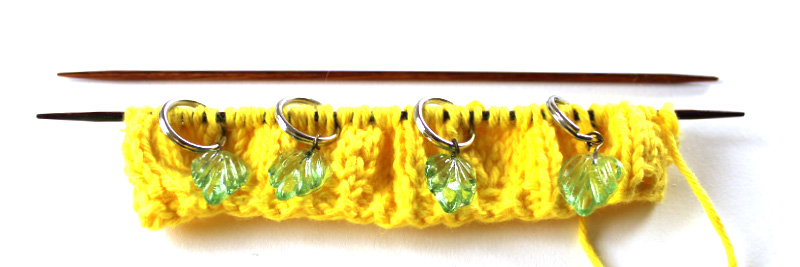
4 x stitch markers
embroidery needle
crochet hook
1 small button to match
Abreviations:
St st – stocking stitch
P – purl
K – knit
Pm – place marker
Spm – slip marker
Inc – increase
Kfb – increase 1 stitch, knit
front and back of next stitch
Directions:
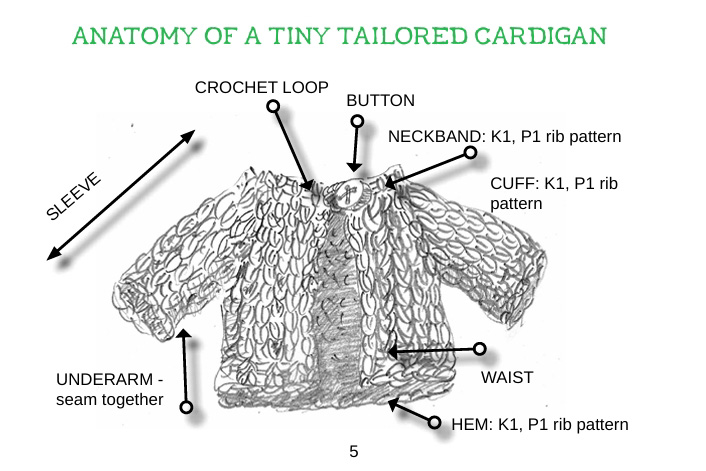
This cardigan is knitted in one piece, top down. The under arm of the sleeves are
hand stitched together. When casting on, make sure to leave a long tail. This wil be
used to crochet a cord to wrap around button or stitched to form a loop.
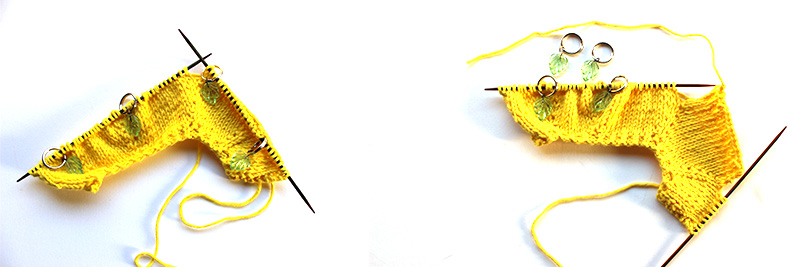
Collar:
Make sure you leave enough yarn to crochet a small loop. Cast on 32 stitches.
Working from the top down.
Rows 1 and 2: K1 P1 (rib pattern).
Row 3: K6, Pm, K5, Pm, K10, Pm, K5, Pm, K6.
Row4: K2, P to last two stitches, K2. Slip markers as you go.
Increase row:
Row 5: Knit across till one stitch before and after each marker, KFB.
Row 6: K2, purl across to last two stitches, K2.
Repeat rows 5 and 6 till you have increased, (9,11,15,11,9) stitches between each
marker. End on a purl row, 55 stitches.
Next row: Increase sleeve stitches only, till you have (9, 17,15,17,9) stitches between
marker. End on a purl row, remembering to knit the first two and last two stitches.
67 stitches
First Sleeve:
Next row: K26, turn. working between the 2 sleeve markers continue in St st for 4
rows.
Next two rows: K1, P1.
Next row: cast off. Leave a 25 cm tail.
Second Sleeve:
Join yarn K15, Spm, K17, turn.
Continue in St st stitch, between the two markers, for 4 rows.
K1, P1 in rib pattern for 2 rows.
Cast off, leave a 25 cm tail.
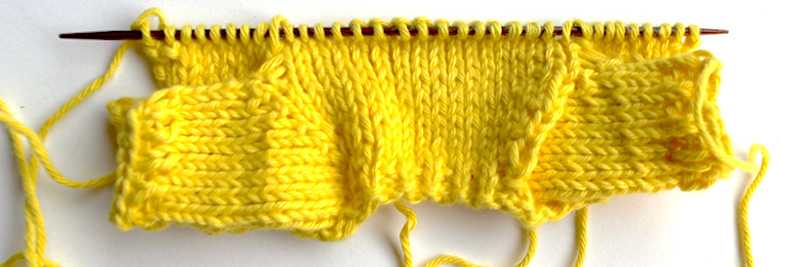
Nearly there!
Join yarn, Knit the last 9 stitches.
Next row: K2, purl to last two stitches, K2.
33 stitches.
Continue in St st pattern for 4 rows.
Next row: K1, P1 in rib pattern for 2 rows.
Cast off, leave a 10 cm tail.

Finishing:
Using your embroidery needle and the long tail ends, sew underarm seams.
Sew in all loose threads.
Using your crochet hook, make a chain using the long tail end from your first cast on.
You can choose to either make a loop or leave as a long cord to wind
around the button.
Sew a button on the opposite side, using matching cotton.
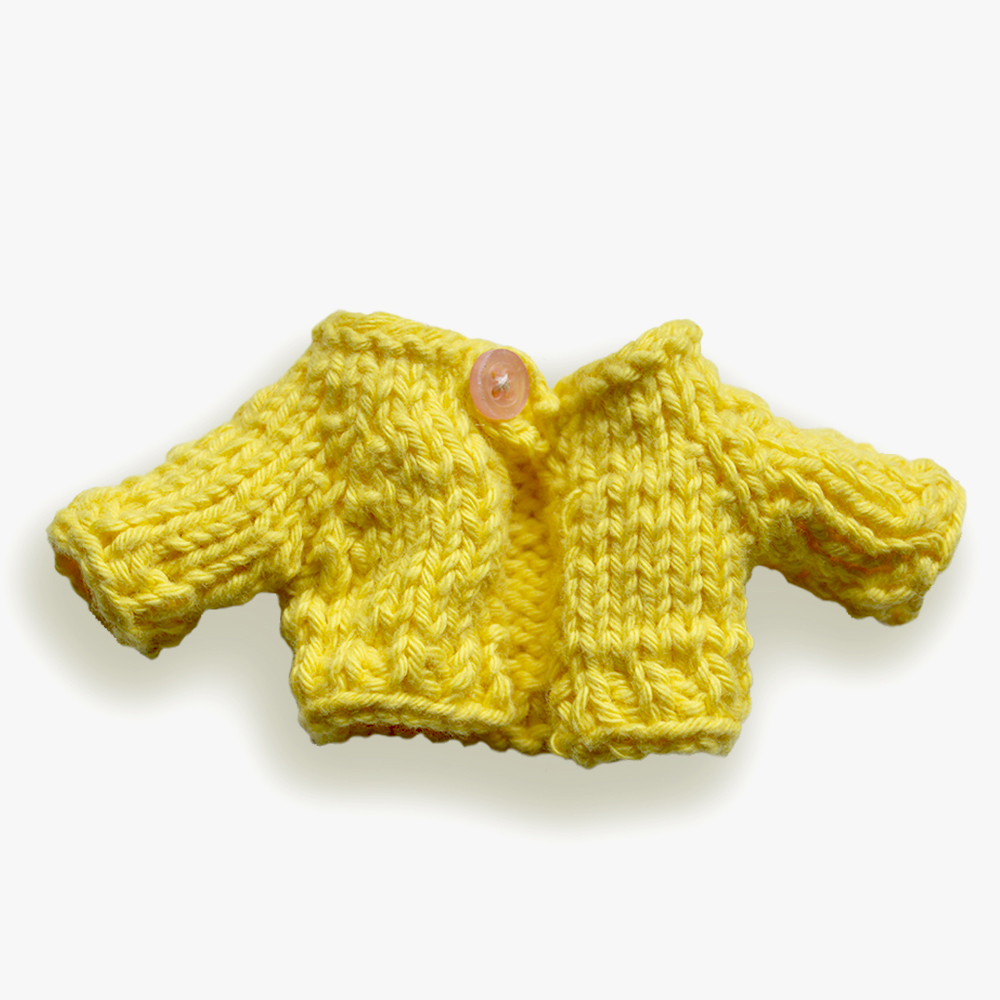
Congratulations you made your way to the end and have knitted
up a tiny tailored cardigan. now its time for your doll to try it on and, take some photos!
Notes:
I have made these cardigans using a variety of wool brands and plys.
From 3ply to 8ply, sock yarn to mohair. To keep the cardigan in scale for my dolls I
use the smallest double pointed needles, so even with an 8 ply I will use 2.00 mm or
2.5 mm needles.
an extra row or two can be added if your dolls have longer arms or add more
increases between the sleeve markers, for dolls with a bit more volume to their arms.
Please contact me if you have any problems with this pattern. Share a photo of your
finished cardigan, I would love to see it.
- The Tiny Tailored Cardigan pattern was made and designed by Grace.H. Garton.
This pattern is copyright, intended for personal use only, please do not distribute or sell this pattern elecrtonically or in hard copy. - Finished cardigan can be sold.